JJ40 ortholinear keyboard build & review (Gateron Clears)
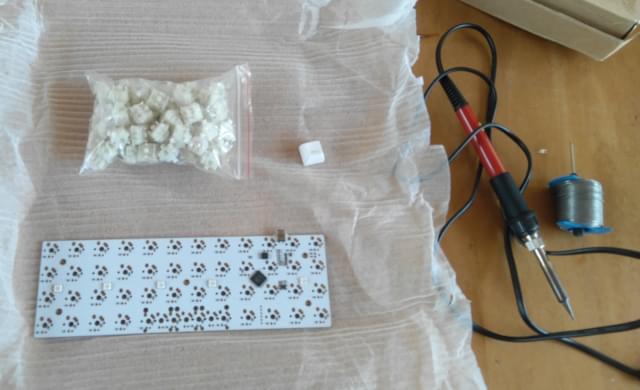
Recently I completed an ortholinear keyboard build using parts I got from AliExpress during their 10th year anniversary. As is well known, I approve of Chinese components and products for their value proposition and indie mindset. I got them for what I consider very low prices; a fully custom build like this will usually run you north of $100, and for the good stuff north of $200. However, for what I consider a medium-range build, I ended up paying under €50, which is great value and I suggest it to anyone who is willing to put in the time to assemble it by themselves. If you want to do it, you will need a soldering iron and solder, which you can order from AliExpress for cheap. Here’s my review of the components and some thoughts on the overall build.
These are the parts I used:
- jj40 board
- random braided USB mini B cable
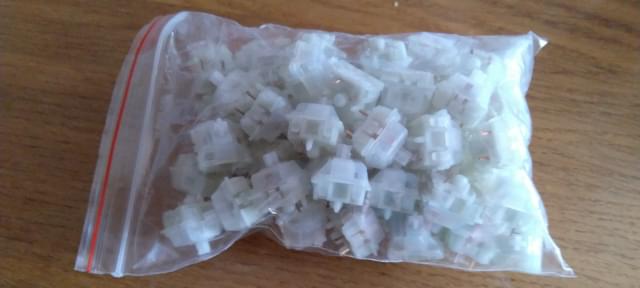
- Gateron clear switches
- PBT SA profile keycaps from IDOBAO
Switches

The switches are the most important part of the build, in my opinion. If you recall the mod log, I’ve been using lubed blue switches, spring swapped with 80g springs. This improved their sound and made them closer to tactile than clicky, although they are still a bit clicky.
For every build I want to try something different, so this time I went for Gateron Clear switches, which are linear and very light at 30g. Red switches, which are the ones usually considered light, are 45g. Gateron is considered a cheap brand, like Outemu, but in my opinion this is untrue, at least for their linear switches. I have Gateron Green switches, and I agree they are obnoxious in sound and the feel isn’t super good, but don’t let that sour your opinion of the entirety of their lineup. I believe they make some of the best linears on the market right now, and they are also priced very competitively, basically rock bottom.
I did not lube the switches because I thought they were smooth enough out of the factory, and I also liked the sound (sound test at the end of the article). I have a cool new lubricant coming from AliExpress (yeah, big surprise), and I might use that, but I don’t think you will be disappointed if you use the switches as they are. I got 5 pin switches, which have extra plastic legs to help guide the switch straight for soldering onto the PCB.
Contrary to internet wisdom, I did not find that I can actuate keys by simply resting my fingers on the keycaps. Of course, everyone is different. I do find myself actuating a key by accident sometimes, but the switches aren’t a huge offender.
They feel very unique to type on because they are so light. If you like laptop keyboards for their switch weight, I believe you will also like this. Gat Clears have the normal 4mm of travel, but you end up using very little force, so you can comfortably bottom out. Since you can type with a light touch and they are linears, they also aren’t very loud. They are good for home and work and you won’t wake people up. Of course you can dampen them more if you use lube and some foam, and then they’ll be more or less inaudible.
If I can compare it to anything, it feels like you’re typing on a cloud. They don’t really feel like anything, because they are so light, so depending on your setup you might end up feeling your keyboard plate or even your desk if you press too hard. This is usually considered a bad feeling, but as you’ll see later in the build, this isn’t really a problem because I took some rather unique measures. ;)
If you use these for your own build, I would suggest using a heavier spring for the spacebar, as you might find 30g too light for such a big key. The rest of the keys shouldn’t be a problem.
Keycaps

I bought the cheapest SA profile keycaps I could find. SA is my favourite keycap profile. Because they are so cheap, they aren’t very sharply sculpted, so the curvature is mostly felt on the guiding keys, F and J. I like the material, especially for the price, and I wouldn’t mind it if all of my plastic devices were with this type. It’s smooth and slightly cold to the touch.
The keycaps I bought fit a bit tight on the stems, so it’s more difficult putting them on and taking them off, but they fit so it’s okay. SA is a very tall profile, so it can be a problem if your keyboard is already very tall, which is bad for your wrists. Consider a wrist rest in that case. Also, because they are tall, they have more space for sound to reverberate, so they may make your keyboard slightly louder. For 10€ I am not complaining.
Board

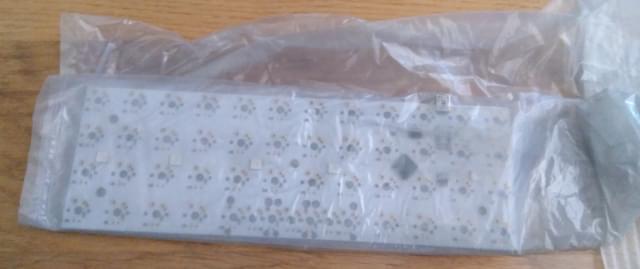
I used the jj40 PCB. It’s a very cute, white PCB with an atmega chip pre-soldered and USB mini B. You can probably get it cheaper if you printed your own Contra PCB at EasyEDA, but keep in mind that you will also have to buy the microcontroller and the diodes yourself and solder them. This isn’t a ton of effort but you might want to go for a more complete PCB if it’s your first build.
The jj40 uses standard QMK for its firmware, so you can jump straight to flashing without much trouble. The reset button is the top right button while you’re plugging it in. The board comes with some LEDs on the back, which I’ve disabled in QMK.
As I’m sure you’ve noticed, the jj40 is very small and doesn’t have space for all the keys. Instead I have one key configured as a layer button, which allows me to type numbers, F keys, and some other random keys. This is not the same as layers defined in ibus; the USB HID protocol is very barebones and only supports very few keycodes, mostly focused around Windows and ASCII for the US.
It is also ortholinear, so the keys aren’t staggered, but spaced out in a normal grid. The primary benefit is typing efficiency compared to a standard keyboard, and using your thumbs for more keys than just space. Your thumbs are your strongest fingers so it’s good using them for at least the shift key.
It takes some getting used to. It isn’t quite as bad as learning a completely new keyboard layout, but the first couple of days are going to be hard for you. I am still learning, but I am getting better.
If you think it’s too small, there’s also the jj50 which has one more row, and the XD75 which also has more columns and should fit everything you need. If you can get them during discount periods, the prices are very good and strongly suggested if they’re your first boards that you’ll be soldering.
You can see my firmware configuration on github.
Assembly and Thoughts

Soldering was dead simple. Insert the switches on the PCB, taking care not to bend any pins, and press hard so that they’re fully inserted. Then heat up your soldering iron and apply solder. You can find YouTube videos of people doing it if you want to see, but if you can shave yourself without dying, you can do this without damaging anything. The process took me about an hour, including fixing 2 mistakes. I took a short break after finishing each row. Very easy build. I think a 6 year old could do it.
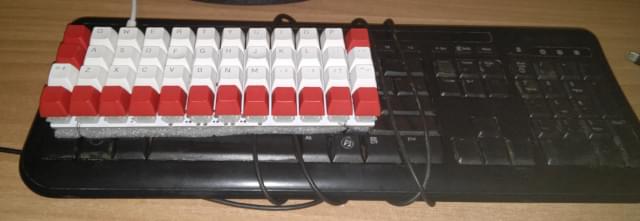
I didn’t use a plate for this build. I also didn’t use a case, or to be exact I made my own case using packing foam and string. You probably already have some from computer electronics, like your motherboard, but you can also use the foam that protects the jj40. It’s antistatic and you should do it to protect the diodes and solder joints from water damage and friction.
Plates are used for two things: helping guide 3-pin switches, and increasing the keyboard rigidity. In my experience, most keyboards are rigid enough without a plate, and this build was no exception. I would have to really try to bend it to put a dent on the PCB, and with the switches soldered on, it’s even stronger. They also change the keyboard feel. Typically, when you press down, the keyboard bends very slightly, and this makes for a better typing experience versus pressing down on metal. Some people disagree, but the current trend in extremely expensive keyboards is the half-plate, so you might as well save yourself 50€ and use no plate.
Going caseless is more controversial. I prefer caseless keyboards ever since I tried it with the AK33 because of the sound and feel difference. I had a towel for the AK33, but the foam does a good enough job with the jj40 so I don’t do the towel mod with it.

Overall, I must say I really like how small it is. It’s almost comically small compared to a full size keyboard, but I can do every I want with it anyway. It’s also very nice for gaming, as you can bind a bunch of things to your thumbs besides just spacebar. My desk and my mind have really cleared up since getting it. I am very satisfied with my purchase and how little I paid for it. 9/10
I have another meme keyboard lined up for another review as soon as it arrives. Rest assured it’s going to be a mega meme with smaller memes inside it, and it’ll be even cheaper than the jj40. Stay tuned for that when it arrives and I finish assembling it.